How to Perform the MCM DAC Mod October 26, 2010 07:10 13 Comments
Jim Williams of Audio Upgrades first tipped recording folks off to the MCM 50-7774, a "hidden treasure" D/A converter with a stellar DAC chip and a very low price tag. The design is an early version of the audiophile-endorsed Beresford TC-7510 that was licensed to OEM manufacturers. And, while it is marketed as a home hi-fi DAC, the 50-7774 has gained popularity among engineers as a professional mixing and mastering converter. The stock unit is impressive in itself (various Gearslutz members have said they prefer it to RME ADI8-Pro, Presonus Central Station, and MOTU 828 mkIII converters), but a couple of mods proposed by Williams and others can put it on par with really high-end DACs. The mods can be done in a couple of hours, and the whole project costs about $135 including the stock unit and premium replacement components.

Tech info: Up to 96kHz/24-bit operation. 2x Toslink and 2x AES/EBU coax S/PDIF digital inputs.
Williams' basic mod consists of three steps:
- Replacing the output chip with two opamps from Analog Devices
- Swapping the .1uF ceramic capacitors for a high-quality alternative
- Replacing the output caps with Panasonic FM series
Sourcing Parts
1. The stock unit
The 50-7774 is available here from MCM Electronics for $118.99. From time to time MCM runs a special in their catalogs, which can save you $15 or so. If the 50-7774 goes on sale again, I will post the discount code here.
2. Opamps and adapter
a. The ADA4898-1 opamps are available from Analog Devices as free samples. On the ADA4898-1 product page add the model 1YRDZ to your sample cart. Make sure you order two!

b. The new opamps will not fit directly on the converter's PCB, so you need to buy a Brown Dog component adapter. The correct model number, 031101, is available here from the Cimarron Technology website for $6.95.
3. Capacitors
a. 2x .1uF: Williams replaced the .1uF ceramic capcitors with very high-quality polyprops from MultiCap. These can be hard to find, but I have tracked down two suppliers who seem to have it in stock:
-
Canada: Parts Connexion
- Follow the link and scroll down to: MULCAP-036-51402. Price: $4.48 CAD/piece
-
US: Percy Audio
- Percy Audio takes orders by email. You want the MultiCap PPMFX seires, .1uf 200VDC. Price:$3.70/piece
If you want a cheaper part that you can combine with your existing Mouser or Digikey order, something like the Panasonic ECW-F .1uF will also do the job.
- Digikey #P12092-ND
- Mouser #667-ECW-F4104JL
b. 2x 470uF: The output caps can be replaced with Panasonic FM 470uF 25v, thin style electrolytics. It's important to make sure you get the thin style so they will fit in the unit! Double check that it has the 0.315"(8mm) diameter.
- Digikey #P12389-ND
- Farnell #1219470
- Mouser #667-EEU-FM1E471L
For those keeping an eye on the price, let's add it all up:
- $119 for the stock unit
- $6.95 for the Brown Dog adapter
- $7.40-$9 for the high-end .1uF caps
- $2-or-so for the Panasonic FM caps
- Total: about $135-140
Modding It
The only unique challenged posed by the mod is replacing the SMD opamp. Working with surface-mount components is no more difficult than the through-hole stuff you are used to if you've got the right tools. A small soldering tip and a magnifying glass help a lot. Also, a solder sucker is probably a bit heavy handed for this project, so I would advise picking up some desoldering wick.
-
 Hakko Soldering Tip, .02" (works with the Hakko 936 iron)
-
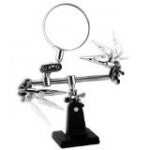
Helping Hands with Magnifying Glass
-
Desoldering Wick
When removing the stock amp, the first thing to do is to remove the two tall 470uF capacitors on either side of it for better access. Since we're junking the old chip, you can make it easier to remove by clipping the leads off at the body. Then remove the leftover legs by heating them and pulling them out with tweezers. After this, clean up the pads with your iron and desoldering wick, but make sure not to linger too long on each or you might lift the pad from the PCB.
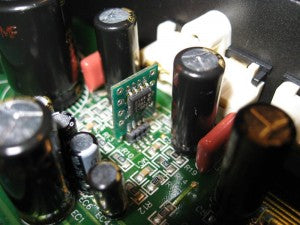
Solder the two ADA4898-1 chips to either side of the Brown Dog adapter and then solder that to the old chip's footprint on the PCB.
All that's left is replacing the the standard, through-hole capacitors and putting everything back together. And that's it! If you've got any questions about the mod, or ideas for additional mods to the 50-7774 please post them in the comments section.
Disclaimer: This post represents my research on how to do this DIY project. Modding electronics can be dangerous and will void your warranty. I do not recommend anyone attempt this who does not have professional knowledge of electronics. I cannot not be held responsible for injuries or damaged equipment as a result of doing this mod.
Additional info:
You can see Jim Williams' original post on Gearslutz here.
Ortiz Audio has a great blog post about doing the mod.

Comments
Dylan on November 12, 2014 17:56
Very cool. Do you know of a similar ADC project?
Peterson Goodwyn on November 12, 2014 17:56
Hi Dylan,
Ahh… don’t we wish. Nobody’s turned up an ADC equivalent to the 50-7774 yet—probably because there’s less of a consumer market for A/D conversion—but there is a more involved DIY project involving the PCM4222EVM chip from Texas Instruments. Jim Williams himself posted the idea on Gearslutz of buying and racking evaluation chips from TI for $149. With racking and a power supply, the project would probably run more around $300, but it’s reputed to be a pretty amazing converter.
CB on November 12, 2014 17:56
It seems that analog devices has made a dual ADA4898 now… the model is ADA4898-2. See http://www.analog.com/static/imported-files/data_sheets/ADA4898-1_4898-2.pdf datasheet. This looks like it may be a direct replacement instead of messing with the dual adapter.
Peterson Goodwyn on November 12, 2014 17:56
Great find! Thanks for pointing that out. I have added a note to the original article.
CB on November 12, 2014 17:56
Just to point out, I havent tried it, I just saw that they added it and thought it might work. I will be trying it soon though.
Peterson Goodwyn on November 12, 2014 17:56
Cool. Please do report back after you’ve tried it.
featherstone on November 12, 2014 17:56
Can anyone tell me where the pad on the brown dog adapter, the pad closest to the viewer on the picture above connects to? I was a little too aggressive with the desoldering wick and accidentally removed the pad. Everything else is soldered properly but I will need to connect the lead from the brown dog adapter directly to whatever it is supposed to connect to. I just cannot see where it leads from there and mcm has no schematic available for this product. Any help would be greatly appreciated.
Featherstone on November 12, 2014 17:56
I figured out where it connects to.
Leee Brown on November 12, 2014 17:56
Have you tried the dual ADA op-amp (ADA4898-2) instead of two of the single ADA 4898-1 op-amps? Is the dual ADA op-amp package completely interchangeable with the 4558? Is the dual ADA 4898-2 audible superior to the initially recommended 2 x ADA4898-1 with Brown Dog Adapter?
I am about to do the recommended modification on a MCM D/A Converter 50-7774. There is an apparently identical Technolink TC-7510 Stereo 24 bit / 96kHz Four Input PCM D/A Converter w/Built-in HP Amp for $105, but it has an external SMPS, whereas the MCM employs an external transformer that connects to a conventional rectifier/capacitor power supply. A 600mH choke between the rectifier and capacitor bank with a 2.2mfd polypropylene film cap shunting the PS capacitors does wonders to improving the sound quality on the MCM.
Leee Brown on November 12, 2014 17:56
email typo error in previous post: klbrow@gmail.com
Lee Brown on November 12, 2014 17:56
Both the MCM 50-7774 and the Technolink TC-7510 are listed as having external SMPS. However, my MCM does not have a SMPS and employs an external transformer that drives a conventional half-wave rectifier/dual capacitor bank. Perhaps my unit is an older version, and that make me skeptical about the sonic qualities of newer versions. As a rule, SMPS are not good for audio. Lots of LC filtering is required SMPS are used because they are less costly to build and to ship than a conventional PS.
Sorry about the previous typographical errors.
M. Ellison on November 12, 2014 17:56
Can anyone report back on their results using the dual ADA 4898 op-amp verses the two single op-amps and the Brown Dog adapter?
Peterson Goodwyn on November 12, 2014 17:56
Let me preface this by saying I have not compared the two side-by-side. However, dual opamps typically perform identically enough to their single counterparts, especially when designed by an exacting company like AD.
Comments are closed for this post.